Create your API keys
The keys are what let your agent look things up in the store — a price, whether something is in stock, where an order got to. They live in WooCommerce itself, four clicks deep, under a tab most people never open.
Start at WooCommerce → Settings → Advanced. That screen is also the answer to the other question everyone asks first: there is no box here for custom code — six sub-tabs, none of them a place to paste a script.
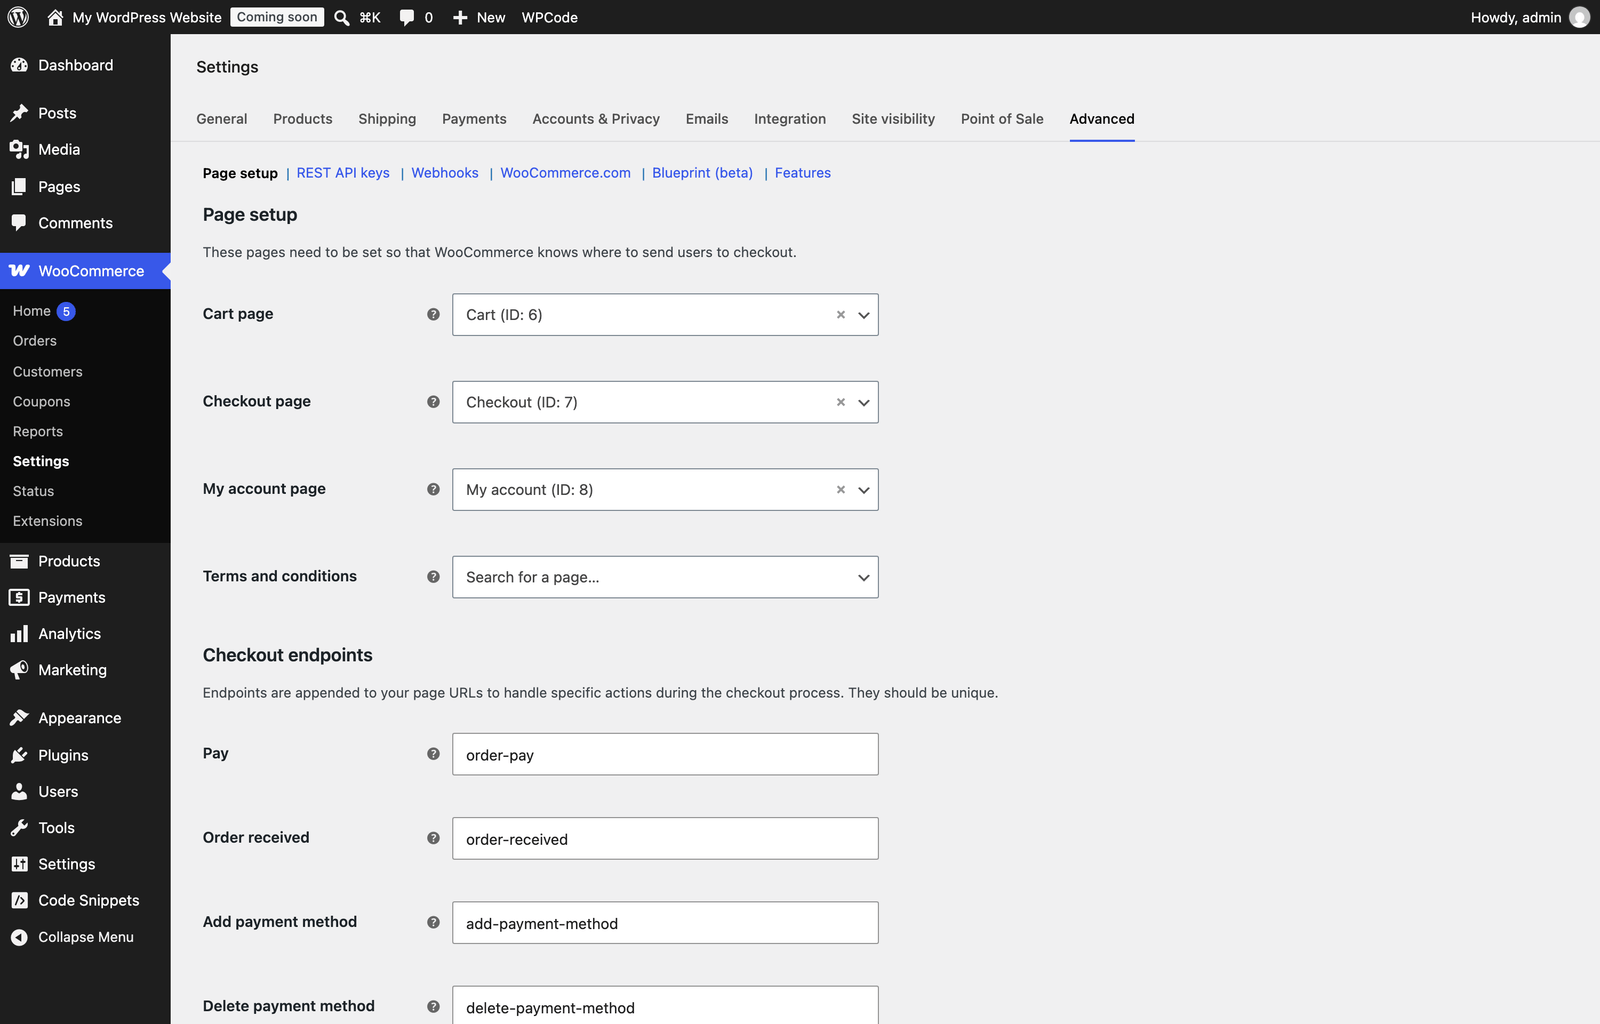
Click REST API keys. On a store that has never issued one, it's an empty screen with a single button.
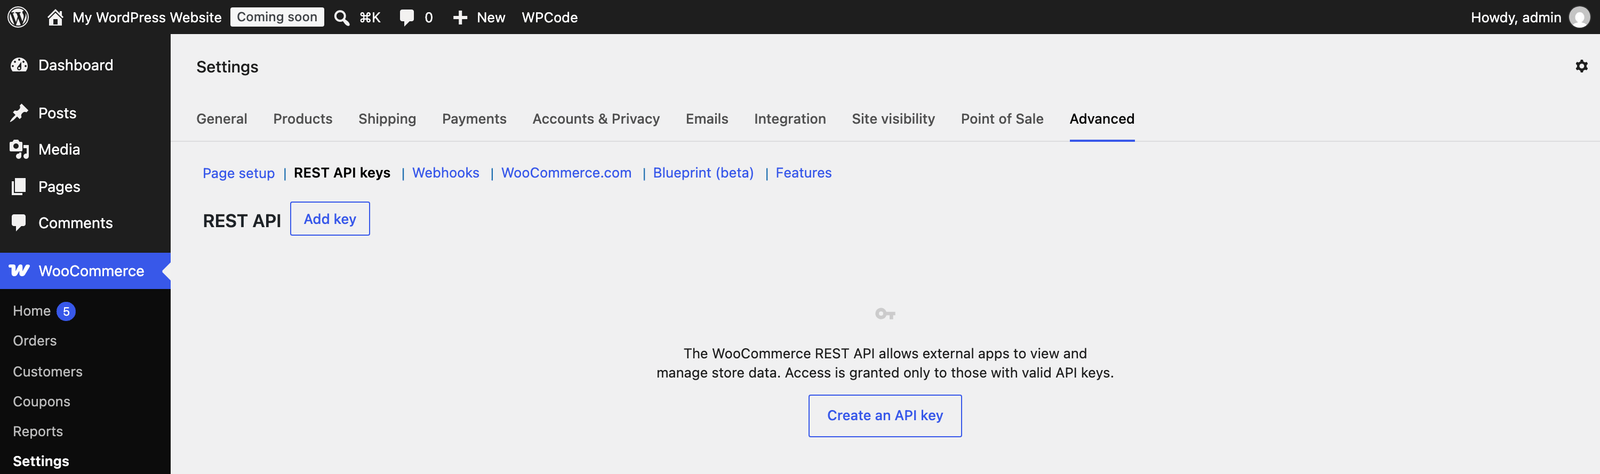
Three fields, and only one of them has a wrong answer:
- Description — name it after who gets the key (“Assistant Labs”). This is how you'll know what you're revoking in a year.
- User — the account the key acts as. Leave it on your admin user.
- Permissions — choose Read. Not Read/Write. Your agent only ever looks things up; a key that can write is a key that can change your prices.
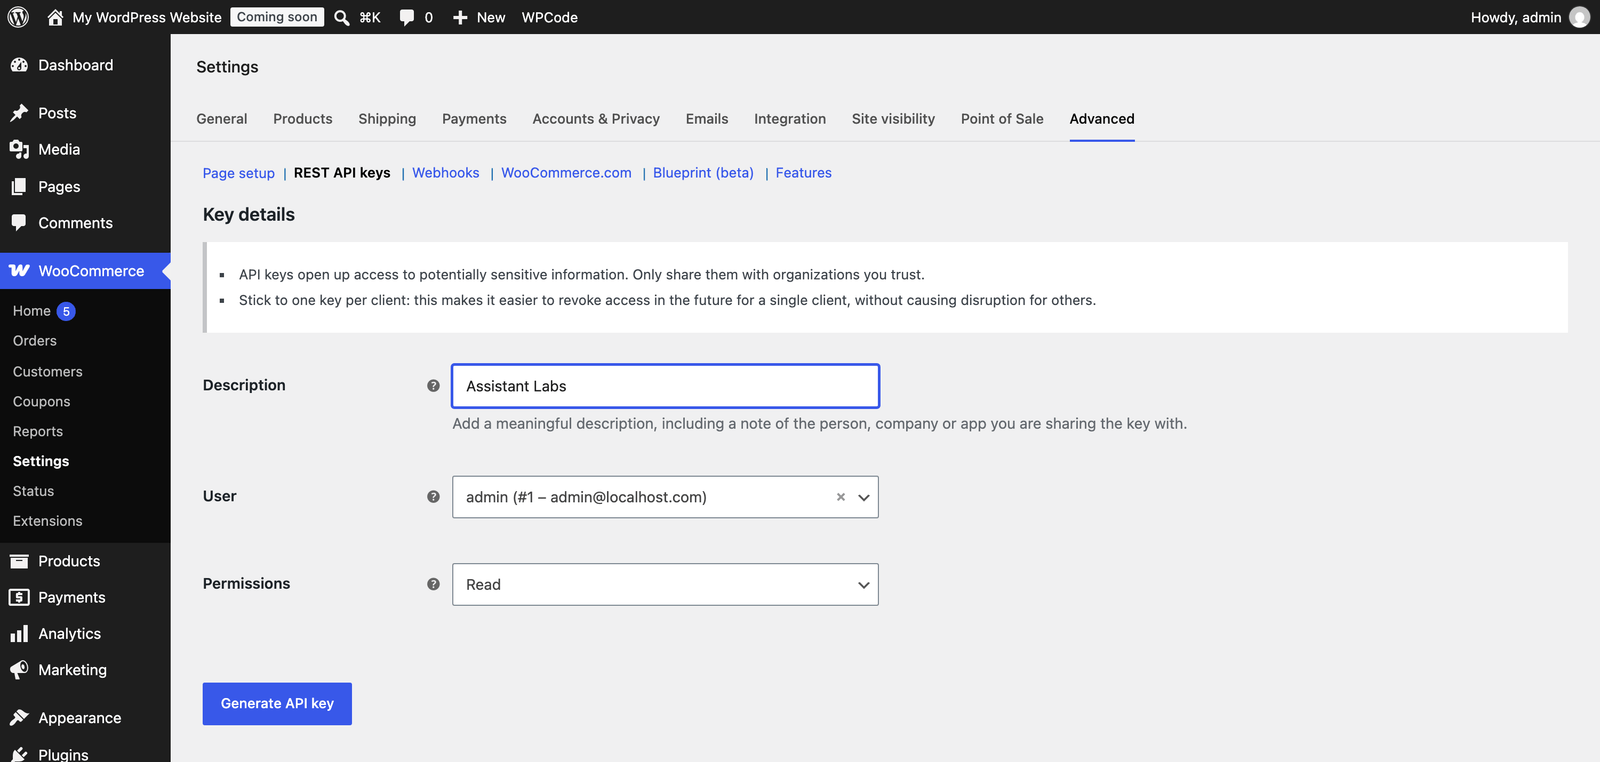
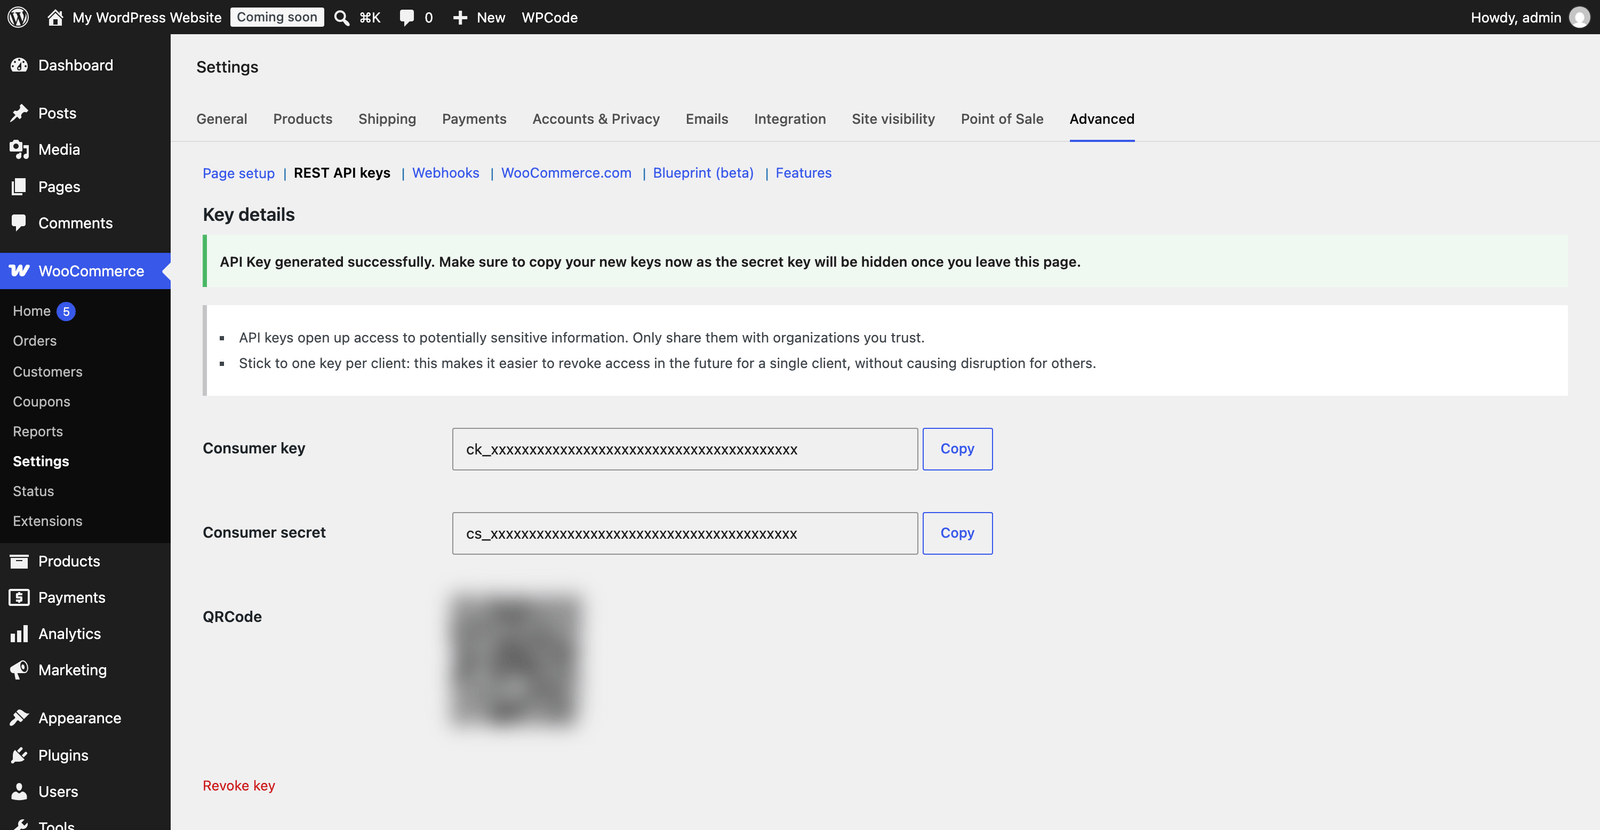
ck_… consumer key and a cs_… consumer secret. (Blurred here — never paste yours into an email or a chat.)Connect the store to your agent
Back in Assistant Labs, open Build → Integrations → WooCommerce and fill in three things:
- Site URL — your store's address, exactly as customers reach it (
https://…, no trailing path) - Consumer Key — the
ck_…value - Consumer Secret — the
cs_…value
Hit Connect WooCommerce. From then on the agent can search your products and categories, and look up a customer's own orders when they ask “where is my parcel” — all read-only, which is why Read was the right permission.
Store on HTTP, not HTTPS? WooCommerce only accepts key-and-secret authentication over HTTPS. On a plain HTTP store the REST API falls back to a signed OAuth handshake, and most integrations — ours included — expect the simple case. Get a certificate first; every host gives them away now.
Add the chat widget
The other half is the bubble customers actually click. In your agent, go to Build → Channels → Website, set the position, language and look, and hit Copy code. What lands on your clipboard is one script tag:
<!-- START Assistant Labs Chat Widget -->
<script src="https://assistantlabs.io/assistantlabs-loader.js" async
  data-assistant-id="assistant_…" data-position="right"
  data-lang="he" data-skin="whatsapp"></script>
<!-- END Assistant Labs Chat Widget -->It has to load before the closing </body> tag on every page — and as screenshot 1 showed, WooCommerce has no field for that. Neither does WordPress. The fix is a free plugin called WPCode, which adds the box that's missing: Plugins → Add New Plugin, search WPCode, Install Now, then Activate.
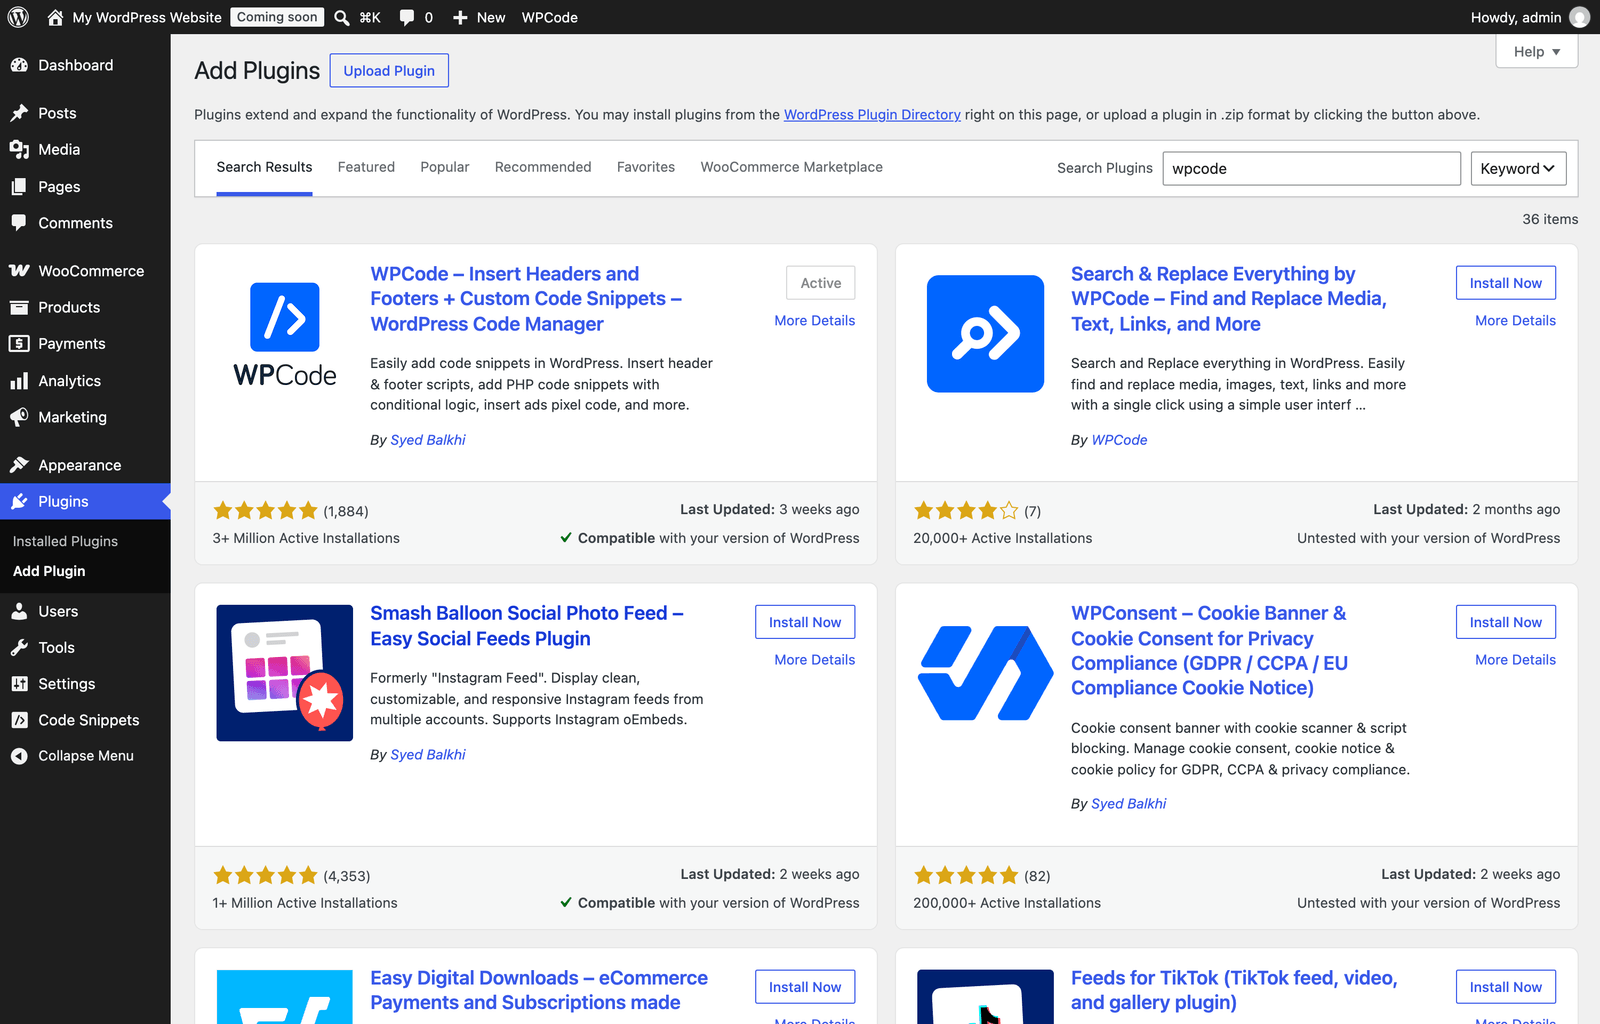
A Code Snippets item appears at the bottom of the sidebar. Open Code Snippets → Header & Footer and you get three boxes, each labelled with exactly where its contents end up.
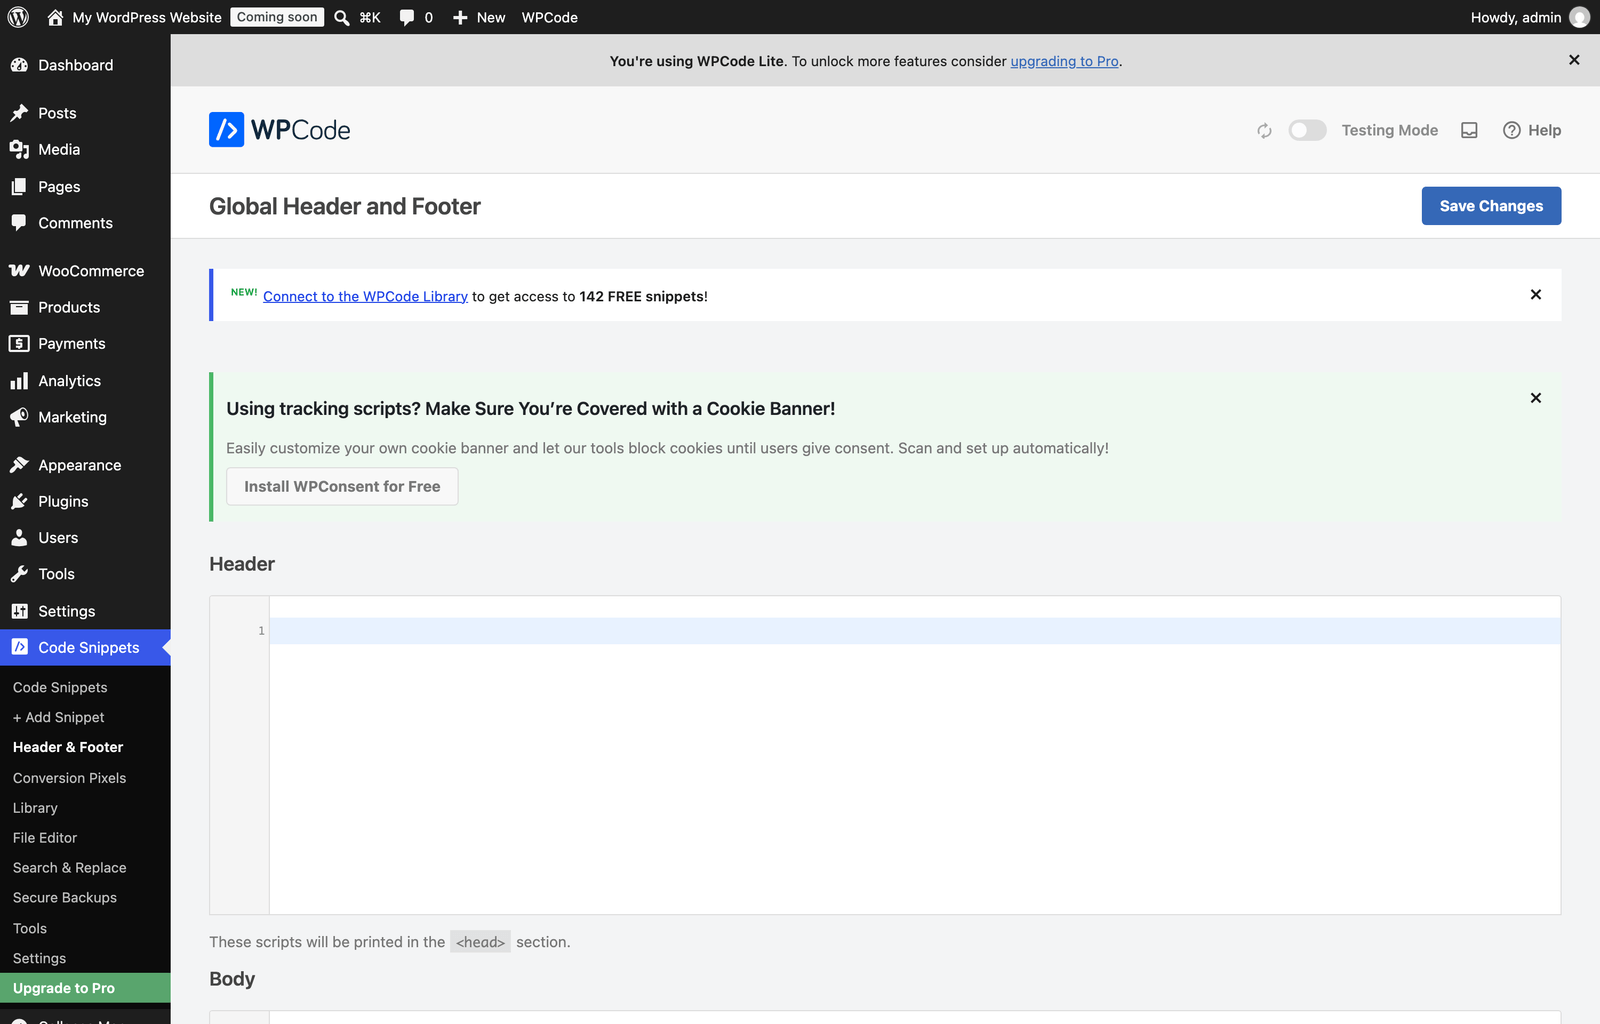
<head>, Body just after the opening <body>, and Footer — “above the closing </body>tag”. That third one is what every install guide is asking for.Paste your snippet into the Footer box and hit Save Changes.
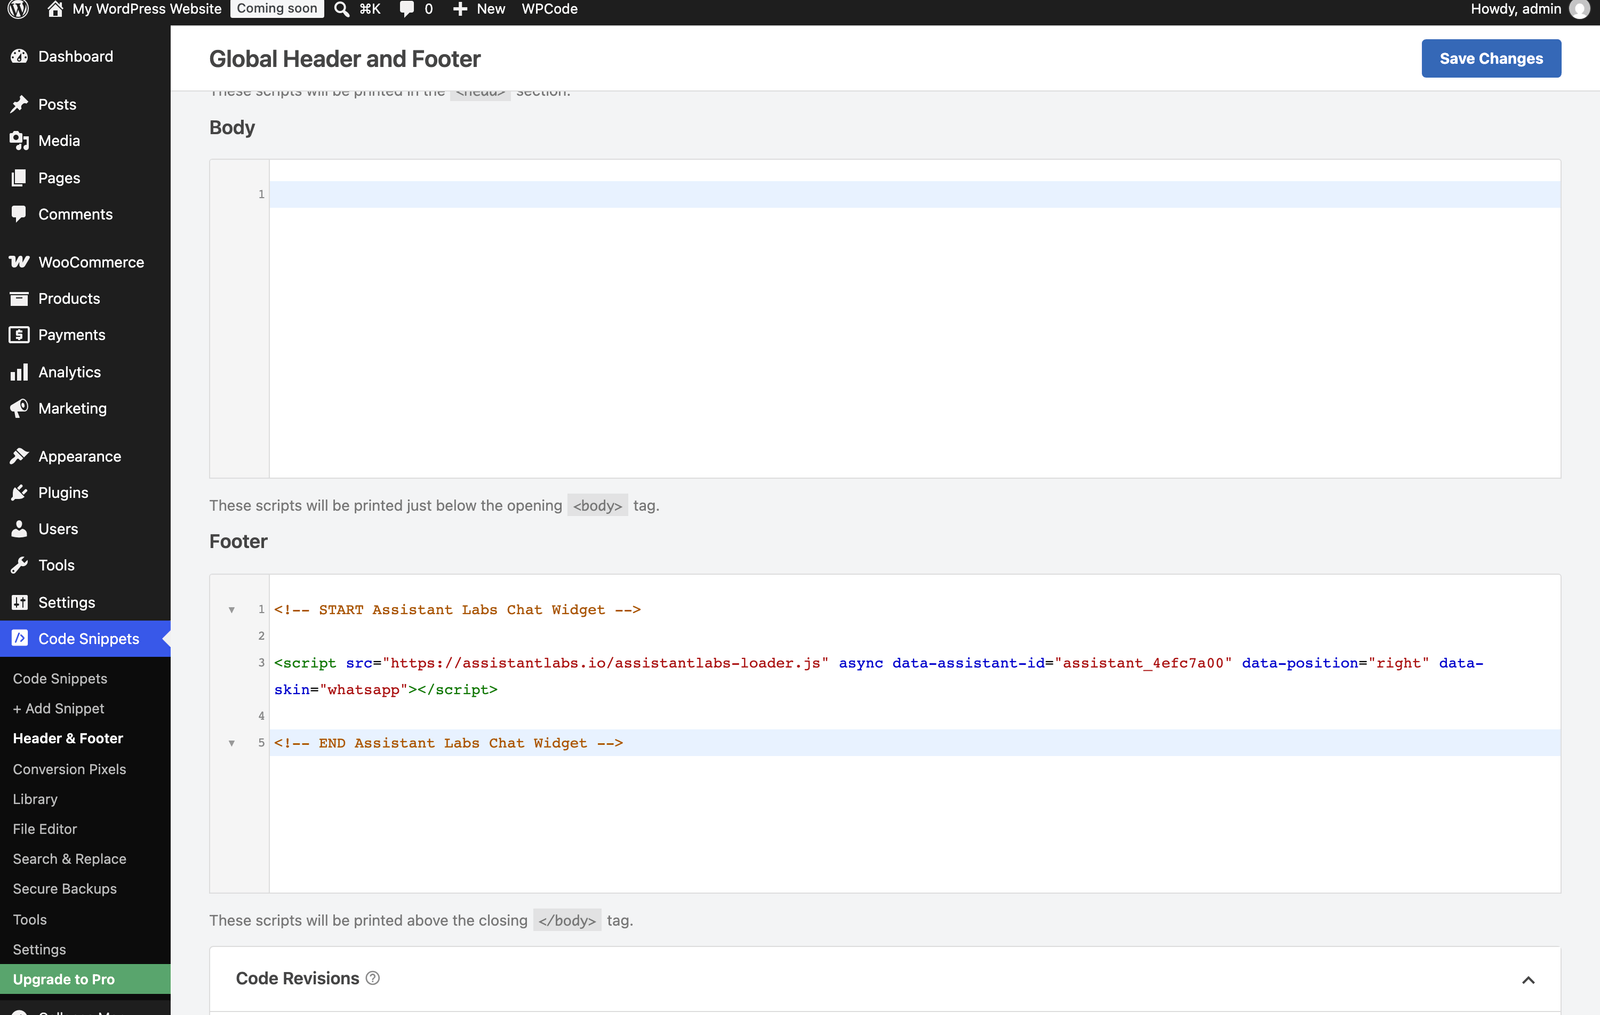
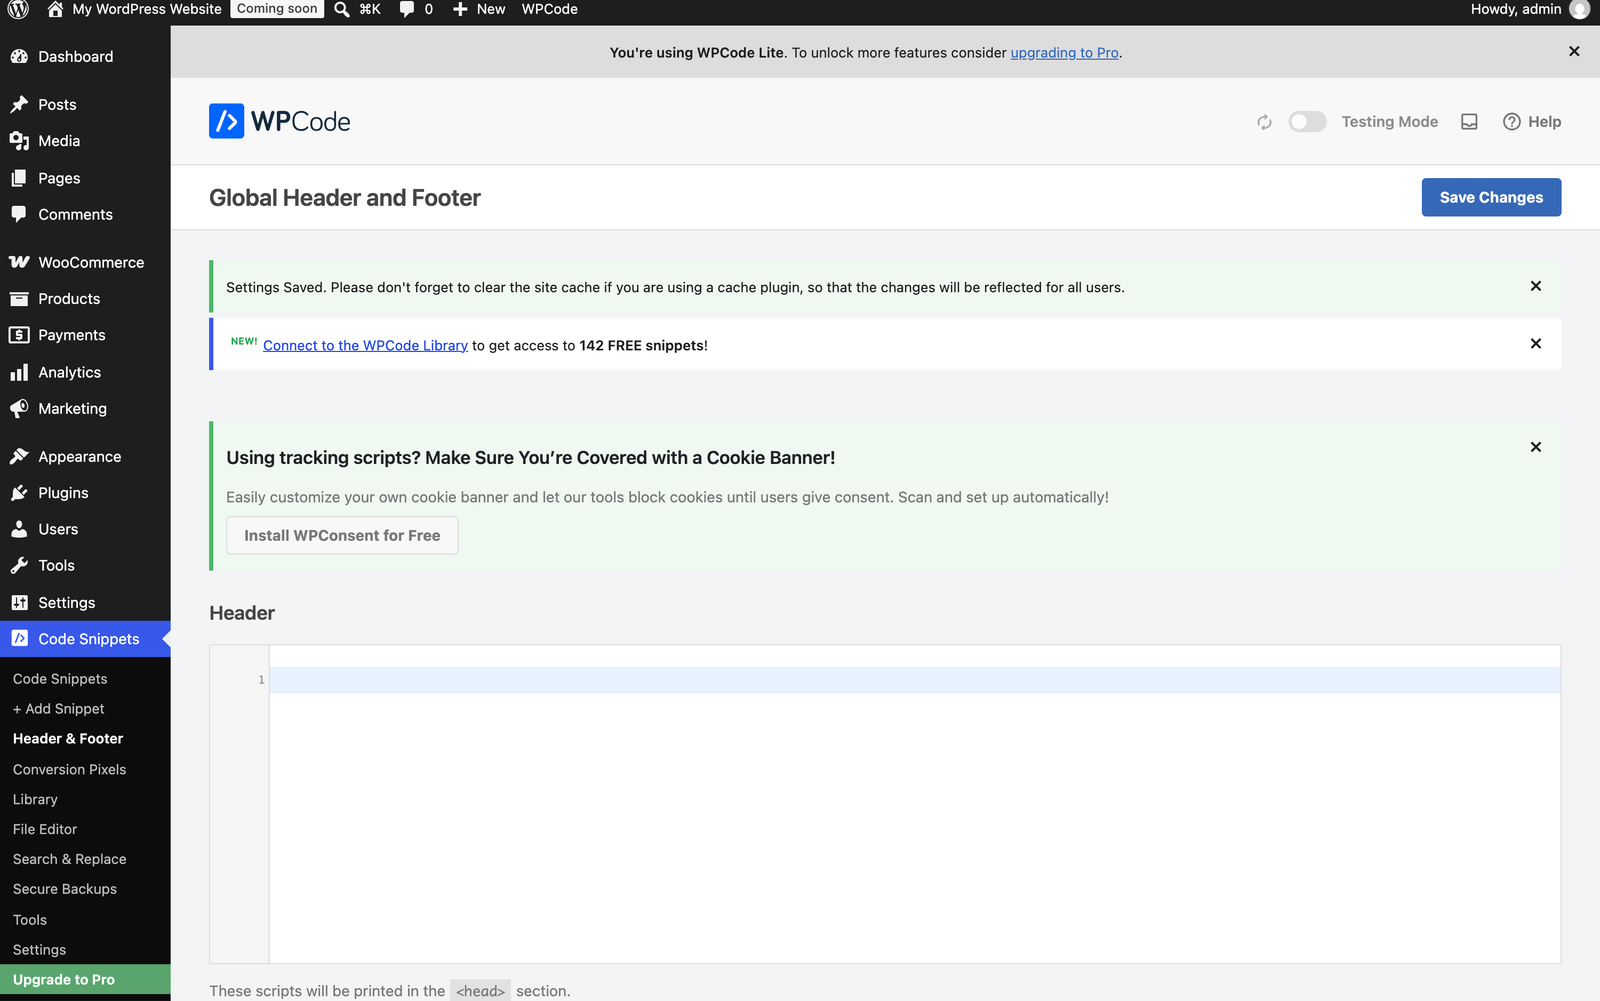
Header or Footer? Either works for an async widget, but Footer is the right habit: anything in the Header box runs before your store has drawn anything, and a slow third-party script there delays the whole page.
Without a plugin
Two alternatives if you'd rather not add a plugin. Both work; neither survives a theme change the way WPCode does.
1. Your theme may already have the field. Most premium themes ship one — look for “Custom Code”, “Header & Footer Scripts” or “Hooks” in the theme's own options (Astra, GeneratePress, Divi and OceanWP all have a version of it). Paste into its footer field and you're done.
2. On a block theme, use the Site Editor. If your store runs a block theme — Twenty Twenty-Four, Twenty Twenty-Five, anything with Appearance → Editor — you can put the snippet in the footer itself:
- Appearance → Editor → Patterns
- Under template parts click Footer, then open the footer your theme actually uses
- Click +, search Custom HTML, add the block at the end
- Paste the snippet into it and Save
The honest caveat: this puts the snippet inside your footer's markup rather than at the end of the document, and it only reaches pages using that template part. For an async chat widget that's fine — it still loads on shop, cart and checkout — but if an integration insists on “the last thing before </body>”, use WPCode.
3. If you have a developer, the real WordPress answer is the wp_footer hook in a child theme's functions.php:
add_action( 'wp_footer', function () {
	?>
	<script src="https://assistantlabs.io/assistantlabs-loader.js" async
	  data-assistant-id="assistant_…"></script>
	<?php
}, 999 );Check it really landed
Don't trust the settings page — trust the store. Open your shop page in an ordinary tab and check three things.
- The bubble appears. Bottom corner of the shop page. Give it a second; it loads after the page does.
- The tag is in the HTML. Right-click → View Page Source, then Ctrl/Cmd+F for
assistantlabs-loader. If it's there, the install worked and anything still wrong is a setting. - Ask the agent a store question.“Do you have X in stock?” — a real answer means the API keys work too, not just the widget.
Where it ends up: after your theme's</footer>and before</body>, on every page including cart and checkout. WordPress's own footer scripts still print after it — normal for anything added this way, and an async widget doesn't care.
When it doesn't show up
Four causes, in the order they actually happen:
1. A cache is serving the old page. Clear the caching plugin and your host's cache, then reload with Ctrl/Cmd+Shift+R.
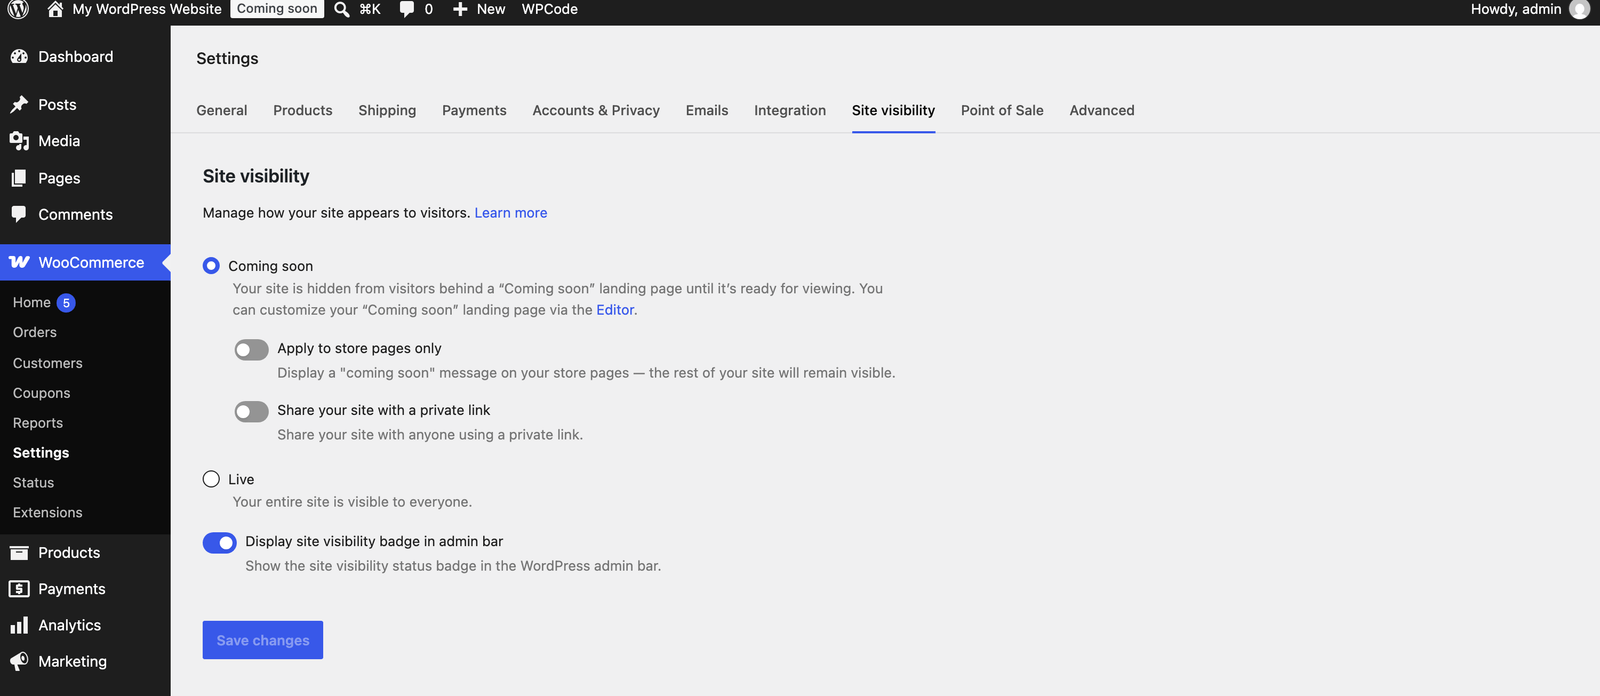
2. The store is still hidden. A new WooCommerce store starts in “Coming soon” mode: you see the store because you're logged in, while everyone else gets a placeholder page — no products, no widget. It's one radio button.
3. A consent or speed plugin is blocking the script. Cookie-banner plugins hold third-party scripts until consent, and “delay JavaScript” options can postpone them indefinitely. Allow-list the assistantlabs.io script.
4. It went in the wrong box. If you pasted into WPCode's snippet editor as PHP instead of into Header & Footer, nothing gets printed. Re-check Code Snippets → Header & Footer.
functions.php hook don't — if your widget vanished the day the site got a new look, that's why.